
The Problem: Connecting AI Assistants to Your APIs#
As AI assistants like Claude and VS Code Copilot become more powerful, developers are discovering a critical bottleneck: these AI tools can’t directly interact with our existing REST APIs.
After building Django DRF to MCP converters and Kafka MCP servers, I realized a fundamental challenge: Every API requires custom MCP server implementation.
You shouldn’t need to write custom code for every API integration. You shouldn’t have to learn Model Context Protocol’s internals just to connect Claude to your weather API, GitHub API, or internal company APIs.
That’s when ContextLayer was born.
What is ContextLayer?#
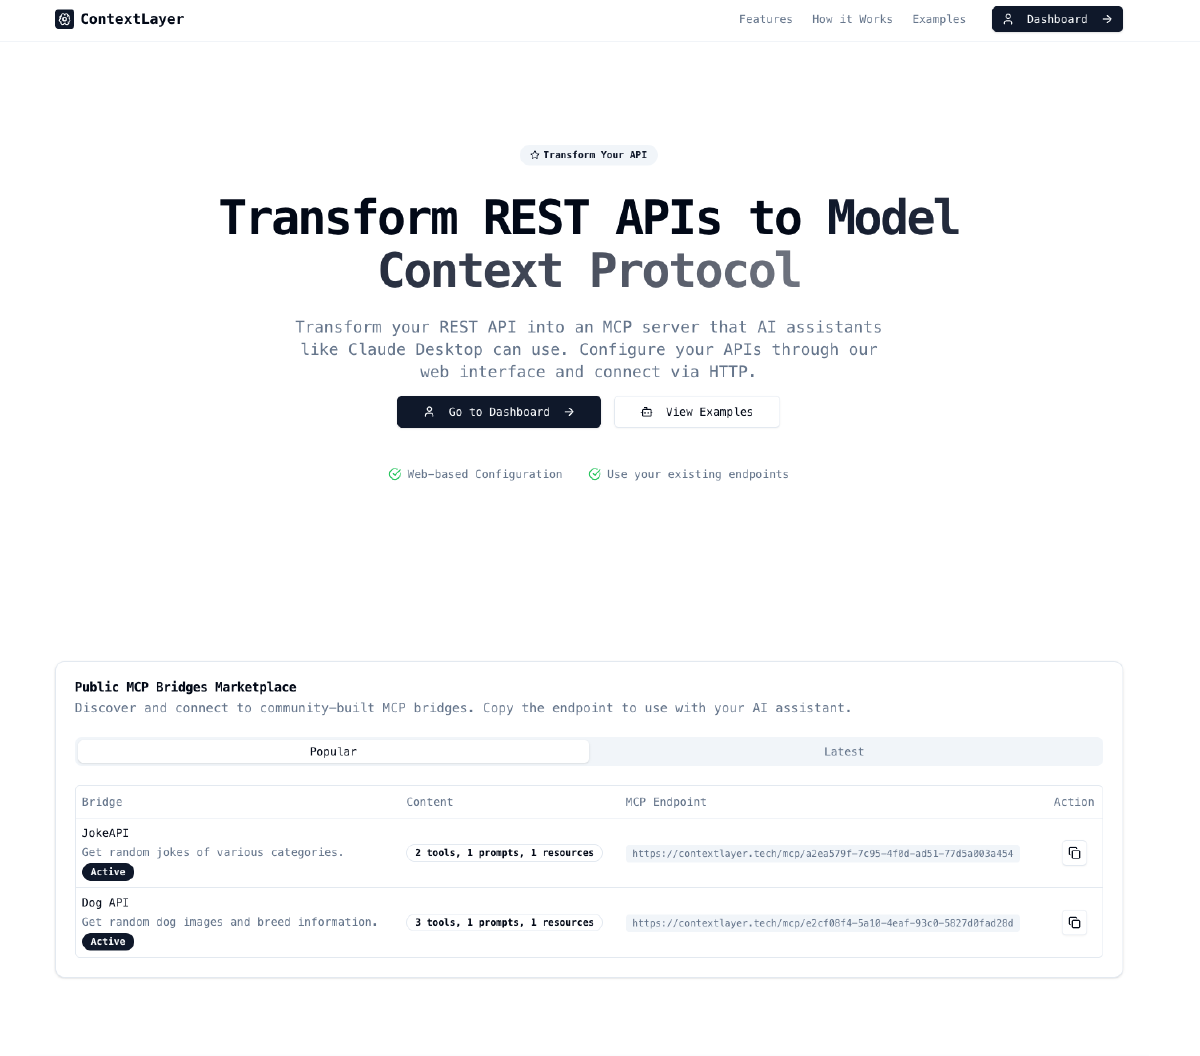
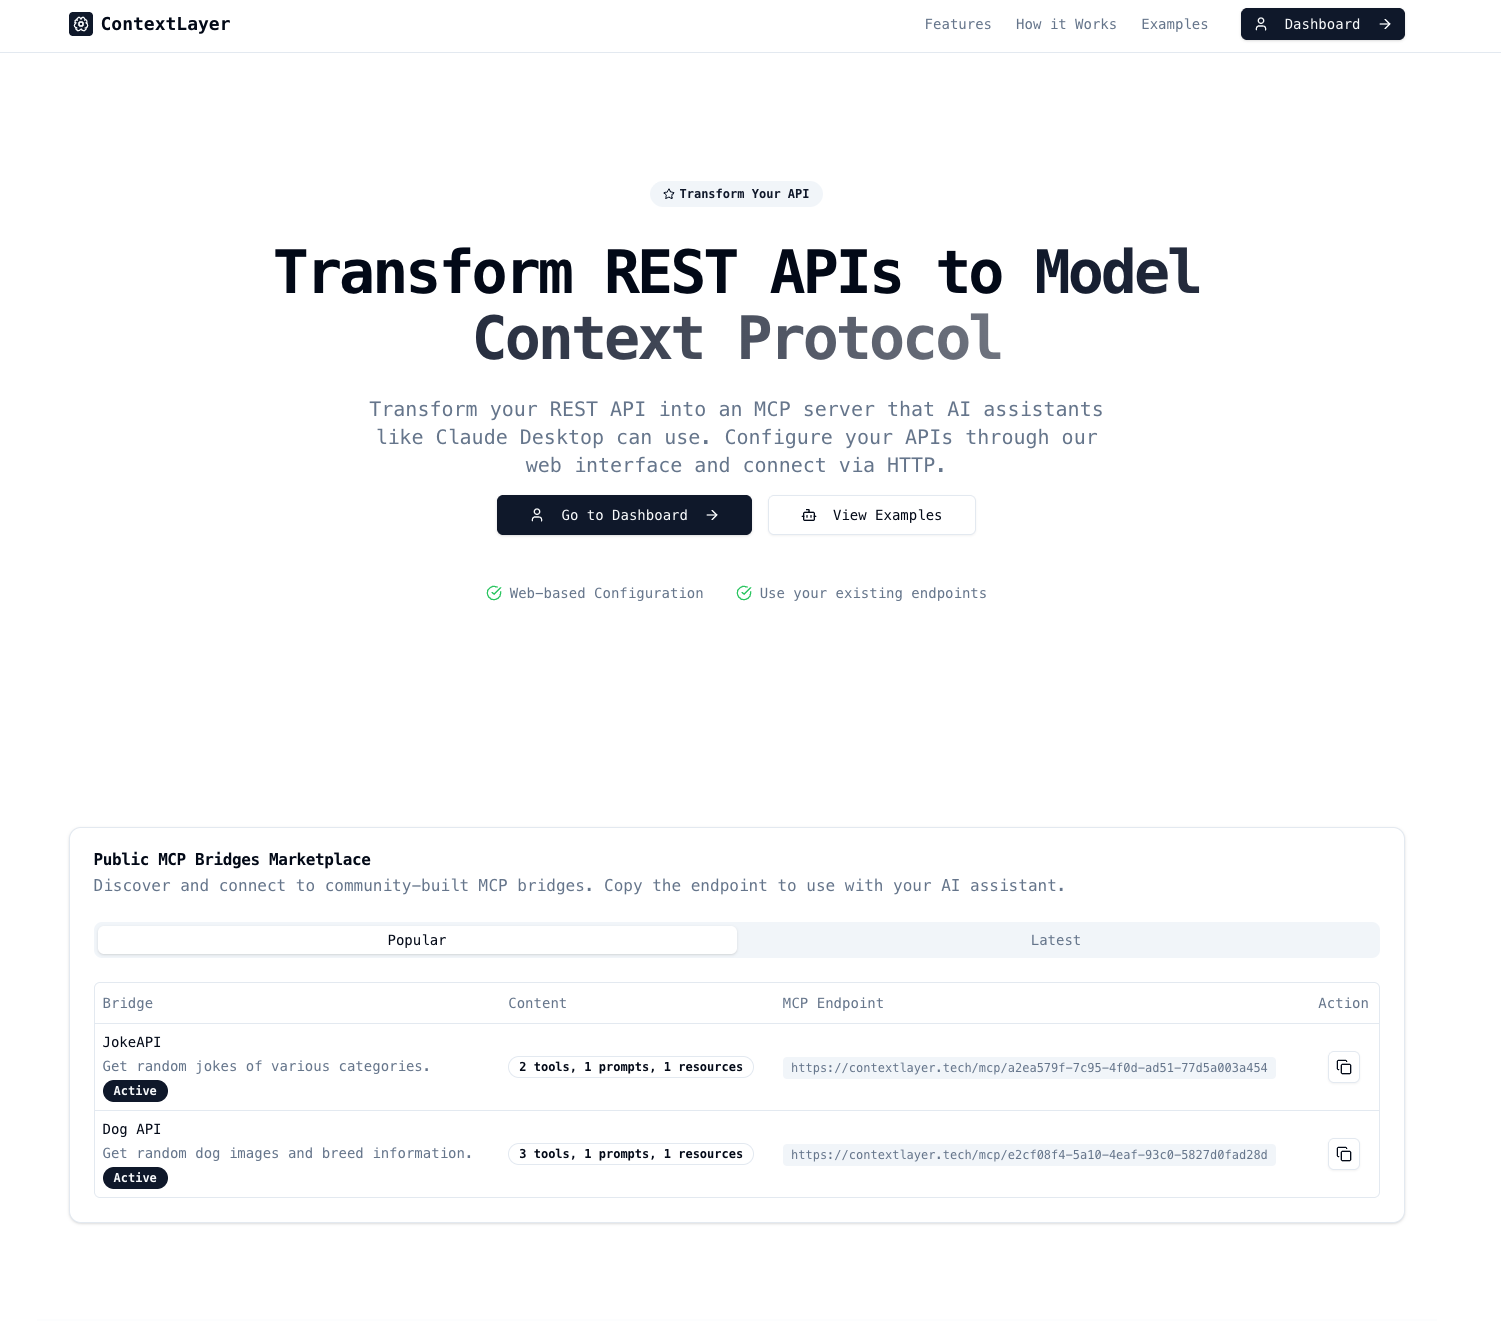
ContextLayer is an open-source platform that transforms any REST API into a Model Context Protocol (MCP) server through a visual, web-based interface. No coding required. No API modifications needed. No MCP protocol knowledge necessary.
Think of ContextLayer as a universal translator between REST APIs and AI assistants:
┌─────────────────┐    ┌─────────────────┐    ┌─────────────────┐
│   AI Assistant  │───▶│  ContextLayer   │───▶│   REST API      │
│   (Claude, etc) │    │   MCP Bridge    │    │  (Any API)      │
└─────────────────┘    └─────────────────┘    └─────────────────┘
The Core Innovation#
ContextLayer bridges the gap between two worlds:
- REST APIs: The standard format used by 99% of web APIs
- Model Context Protocol: The protocol that AI assistants use to interact with external tools
Instead of requiring developers to manually create MCP servers for each API, ContextLayer provides:
- Visual Configuration: Web-based dashboard to configure your API bridges
- Automatic Tool Generation: Converts REST endpoints into MCP tools automatically
- Multiple Authentication Methods: Supports Bearer tokens, API keys, OAuth, and Basic auth
- OpenAPI Integration: Import existing OpenAPI/Swagger specs for instant setup
- Zero Code Changes: Your existing APIs remain completely unchanged
Why ContextLayer Exists#
The Real-World Problem#
Imagine you want Claude to help you manage your GitHub repositories, check weather data, or interact with your company’s internal APIs. Currently, you’d need to:
- Learn the Model Context Protocol specification
- Write custom MCP server code for each API
- Handle authentication, error handling, and protocol compliance
- Maintain separate codebases for each integration
- Debug protocol-level issues when things break
This is too much work for something that should be simple.
The ContextLayer Solution#
With ContextLayer, you:
- Sign up for a free account (or host it yourself)
- Point ContextLayer at your REST API (or upload an OpenAPI spec)
- Configure authentication if needed
- Click “Start Bridge”
- Use your API with Claude immediately
That’s it. Five minutes from signup to AI-powered API interaction.
How ContextLayer Works#
Architecture Overview#
ContextLayer consists of three main components:
- Web Dashboard: Visual interface for creating and managing API bridges
- Bridge Engine: Transforms REST API calls into MCP-compatible tools
- MCP Server: Protocol-compliant endpoint that AI assistants connect to
The Bridge Creation Process#
Step 1: Define Your API#
Creating a new MCP server bridge in ContextLayer is straightforward through the visual interface:
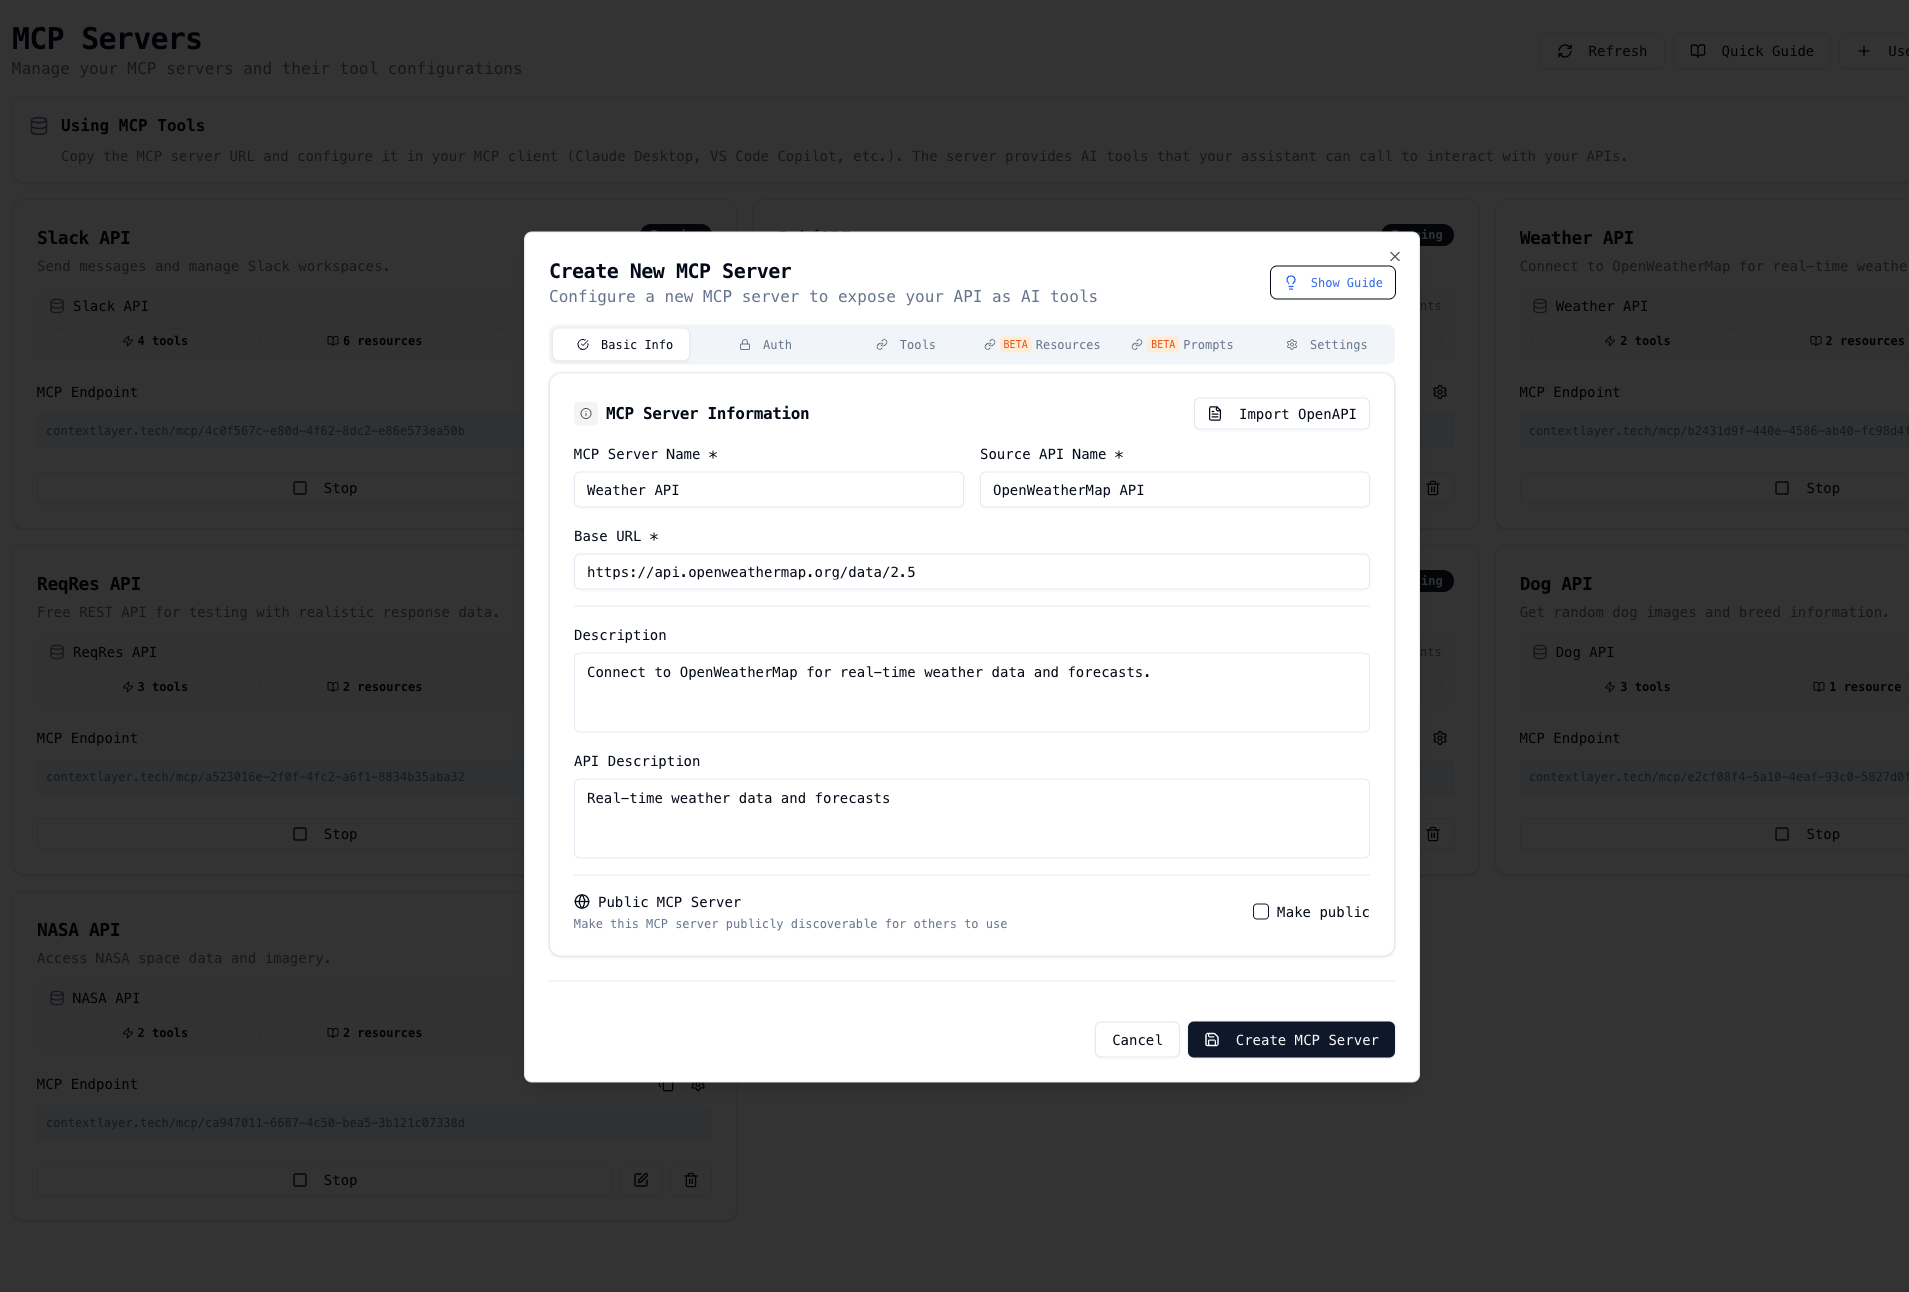
Simply provide:
- Bridge Name: A descriptive name for your MCP server
- Description: What the API does and its purpose
- Base URL: The root URL of your REST API
- OpenAPI Spec (optional): Upload an existing OpenAPI/Swagger specification for automatic configuration
Step 2: Configure Authentication#
ContextLayer supports multiple authentication methods through an intuitive interface:
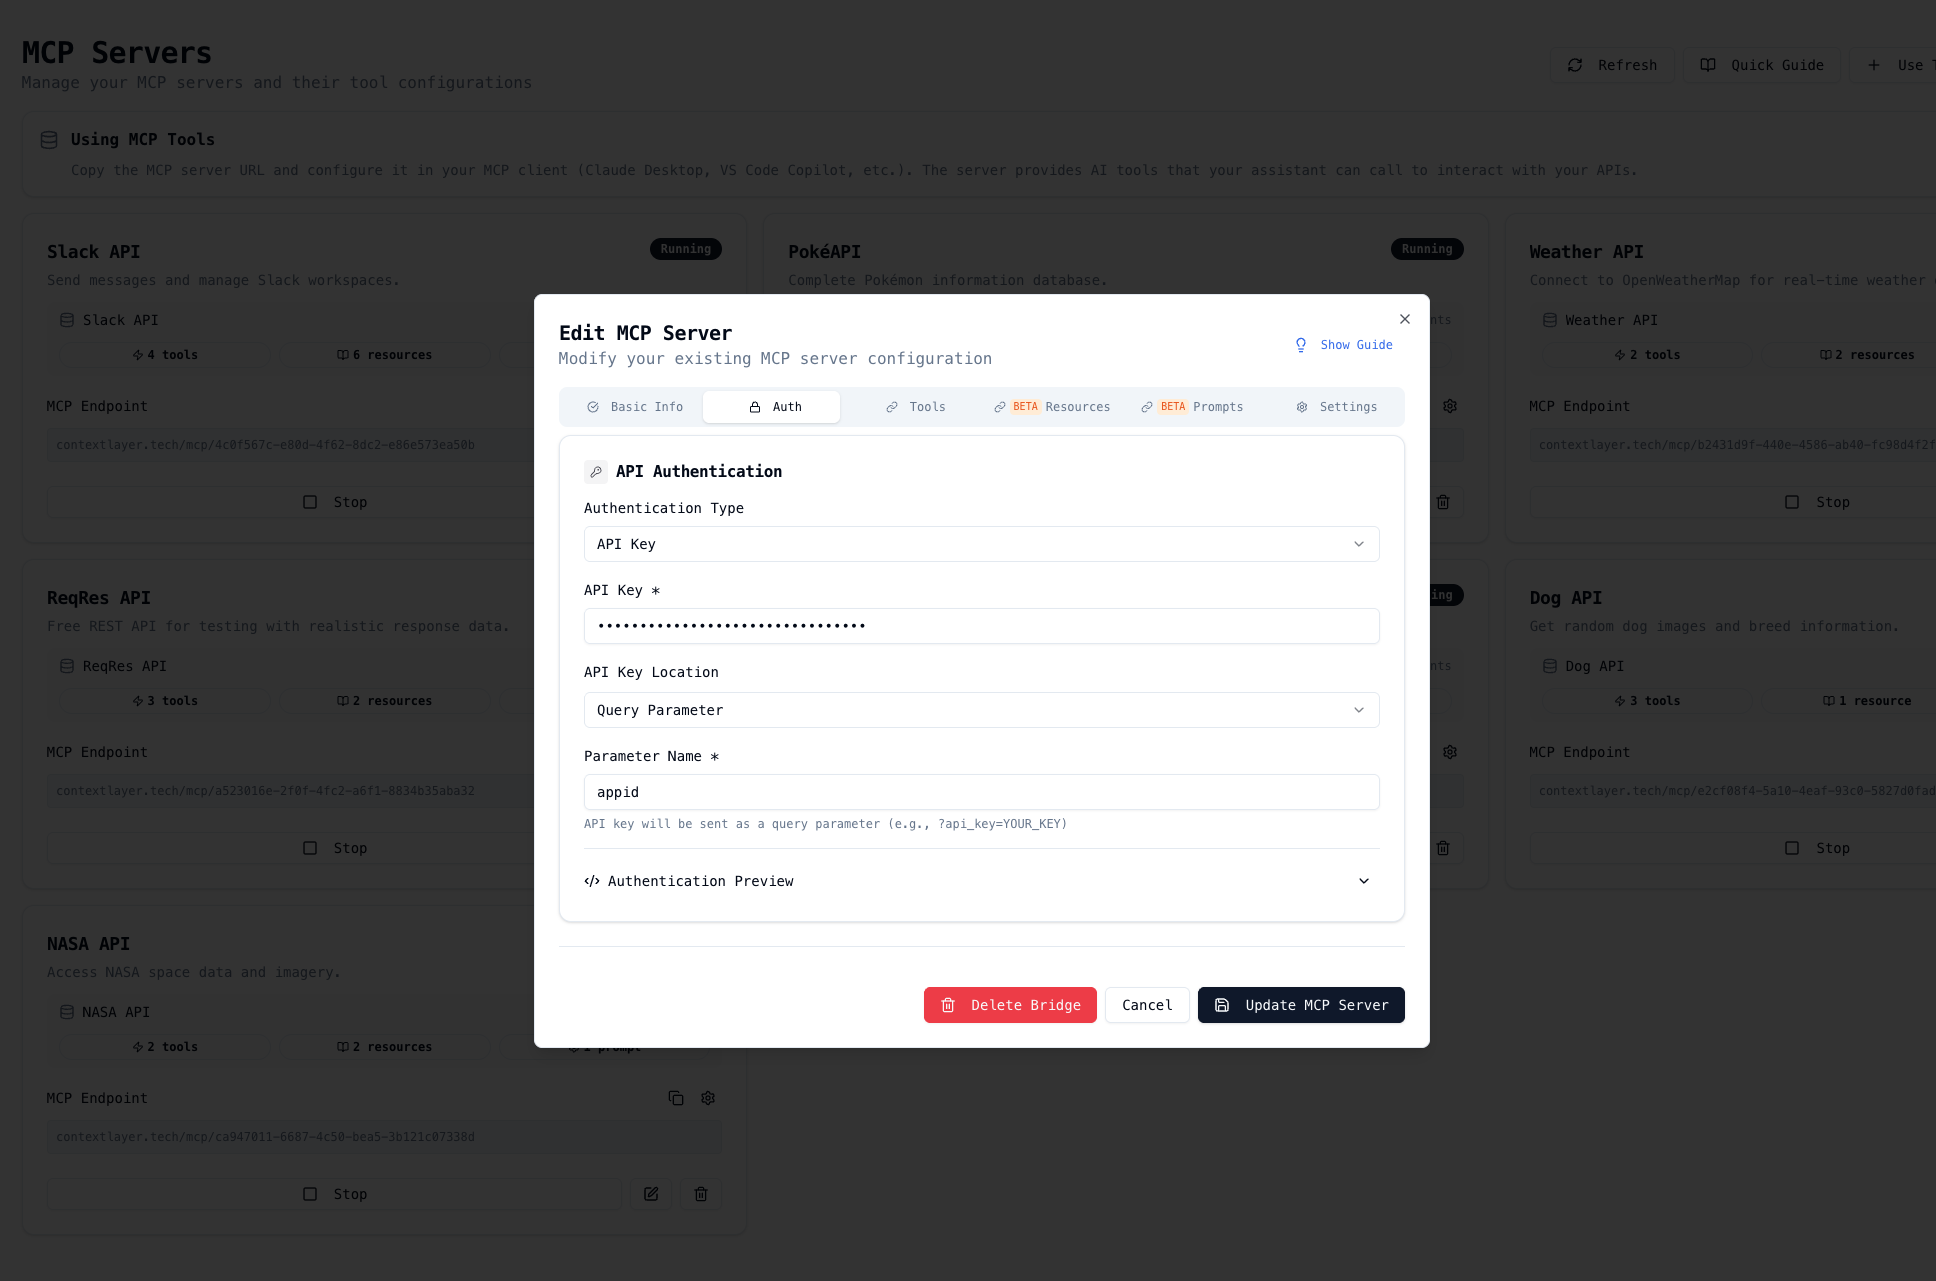
Supported authentication types:
- No Authentication: For public APIs
- Bearer Token: Token-based authentication
- API Key: Header or query parameter-based authentication
- Basic Authentication: Username and password authentication
- OAuth 2.0: Coming soon for advanced authorization flows
All credentials are encrypted and securely stored.
Step 3: Automatic MCP Tool Generation#
ContextLayer automatically converts your REST endpoints into MCP tools through the visual tool editor:
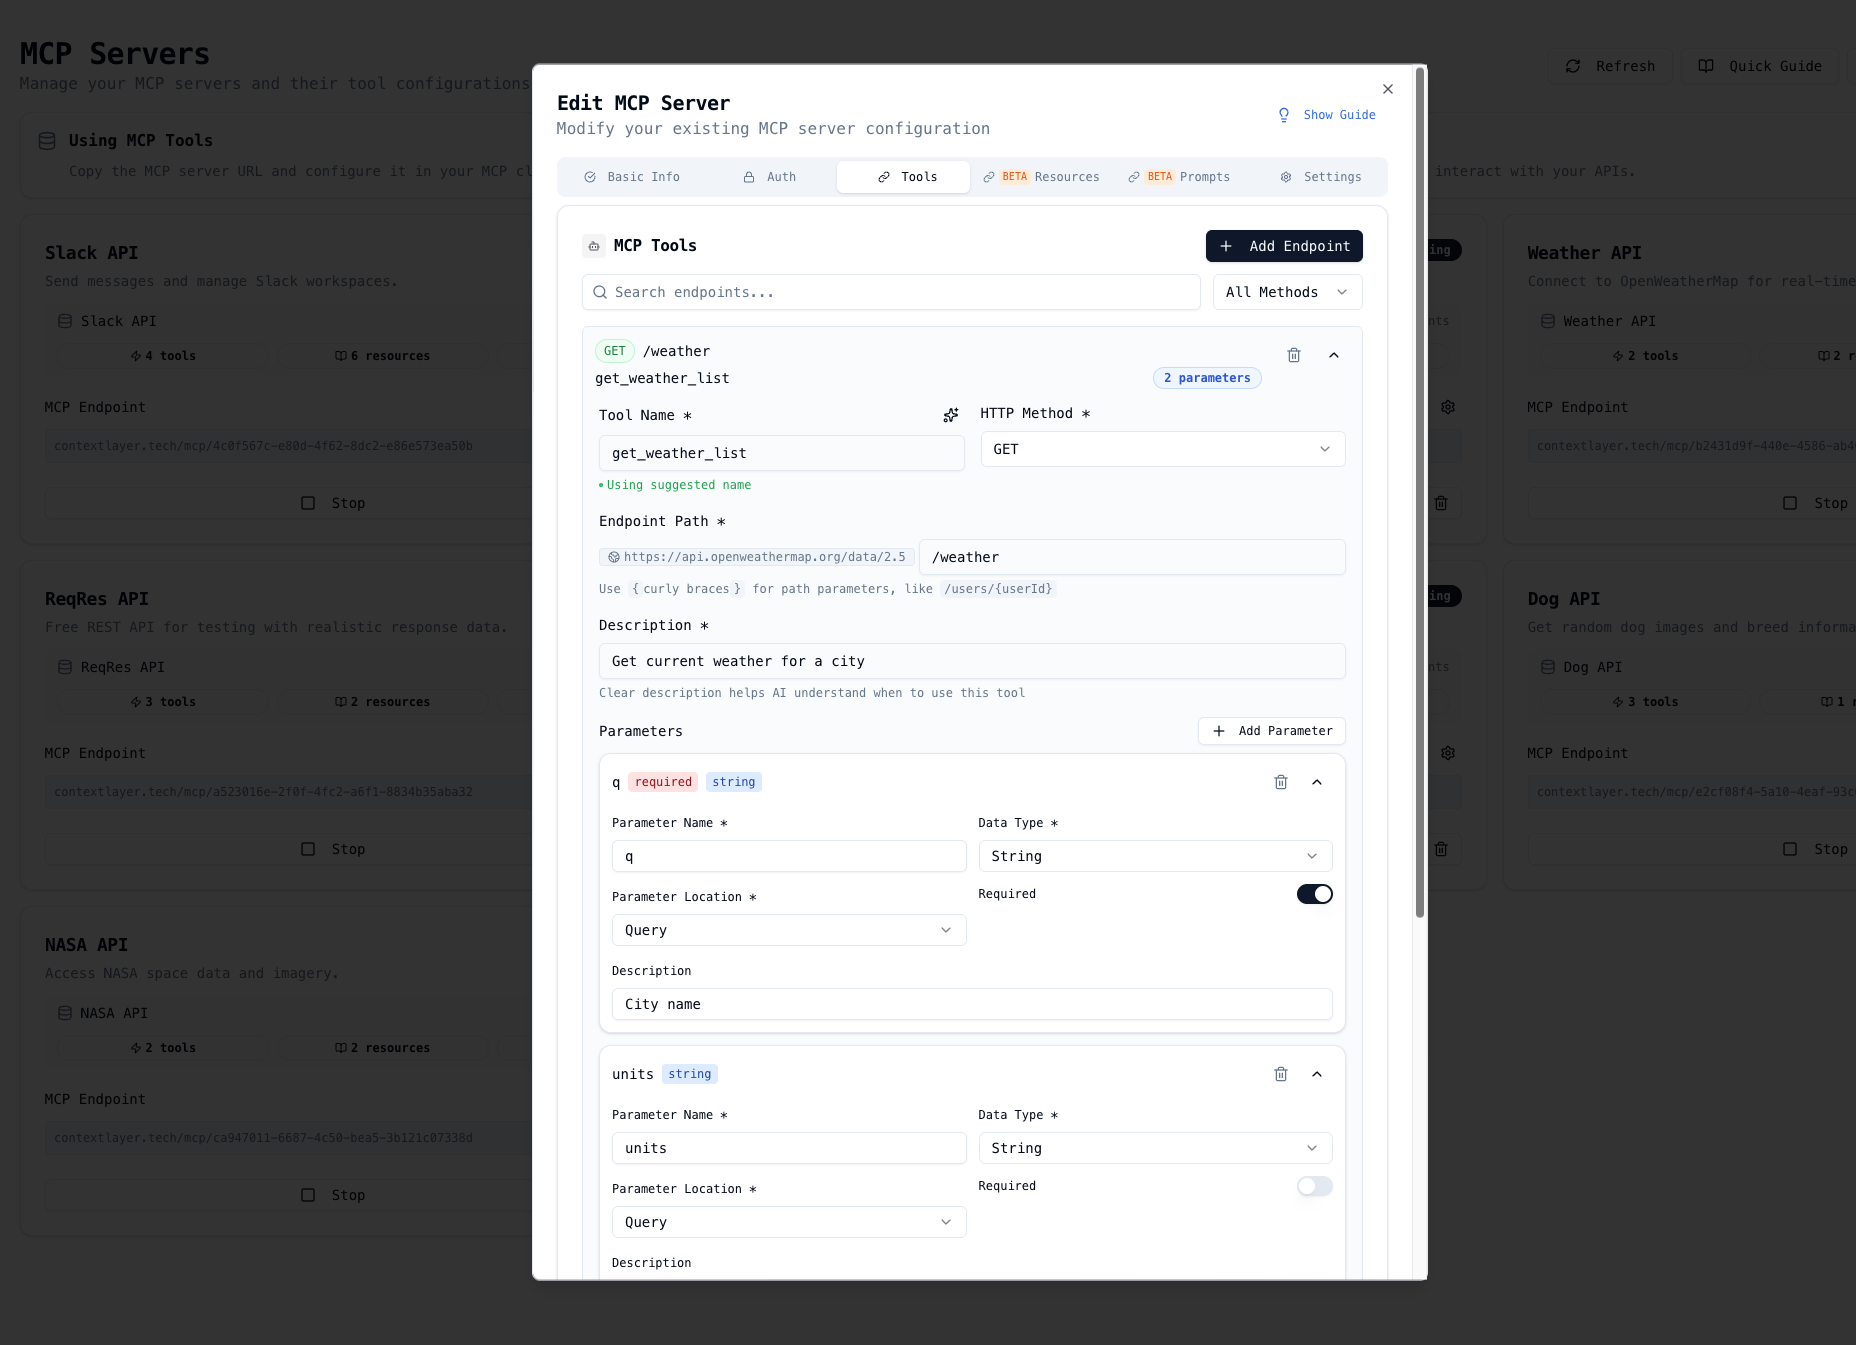
For each endpoint, you can configure:
- Tool Name: The name AI assistants will use to call this tool
- Description: What the tool does (helps AI understand when to use it)
- HTTP Method: GET, POST, PUT, DELETE, PATCH
- Endpoint Path: The API path with parameter placeholders
- Parameters: Path, query, and header parameters with types and descriptions
- Request Body: JSON schema for POST/PUT requests
ContextLayer generates the complete MCP tool schema automatically.
Step 4: Connect to AI Assistants#
Once your bridge is configured, you can see all your MCP servers in the dashboard:
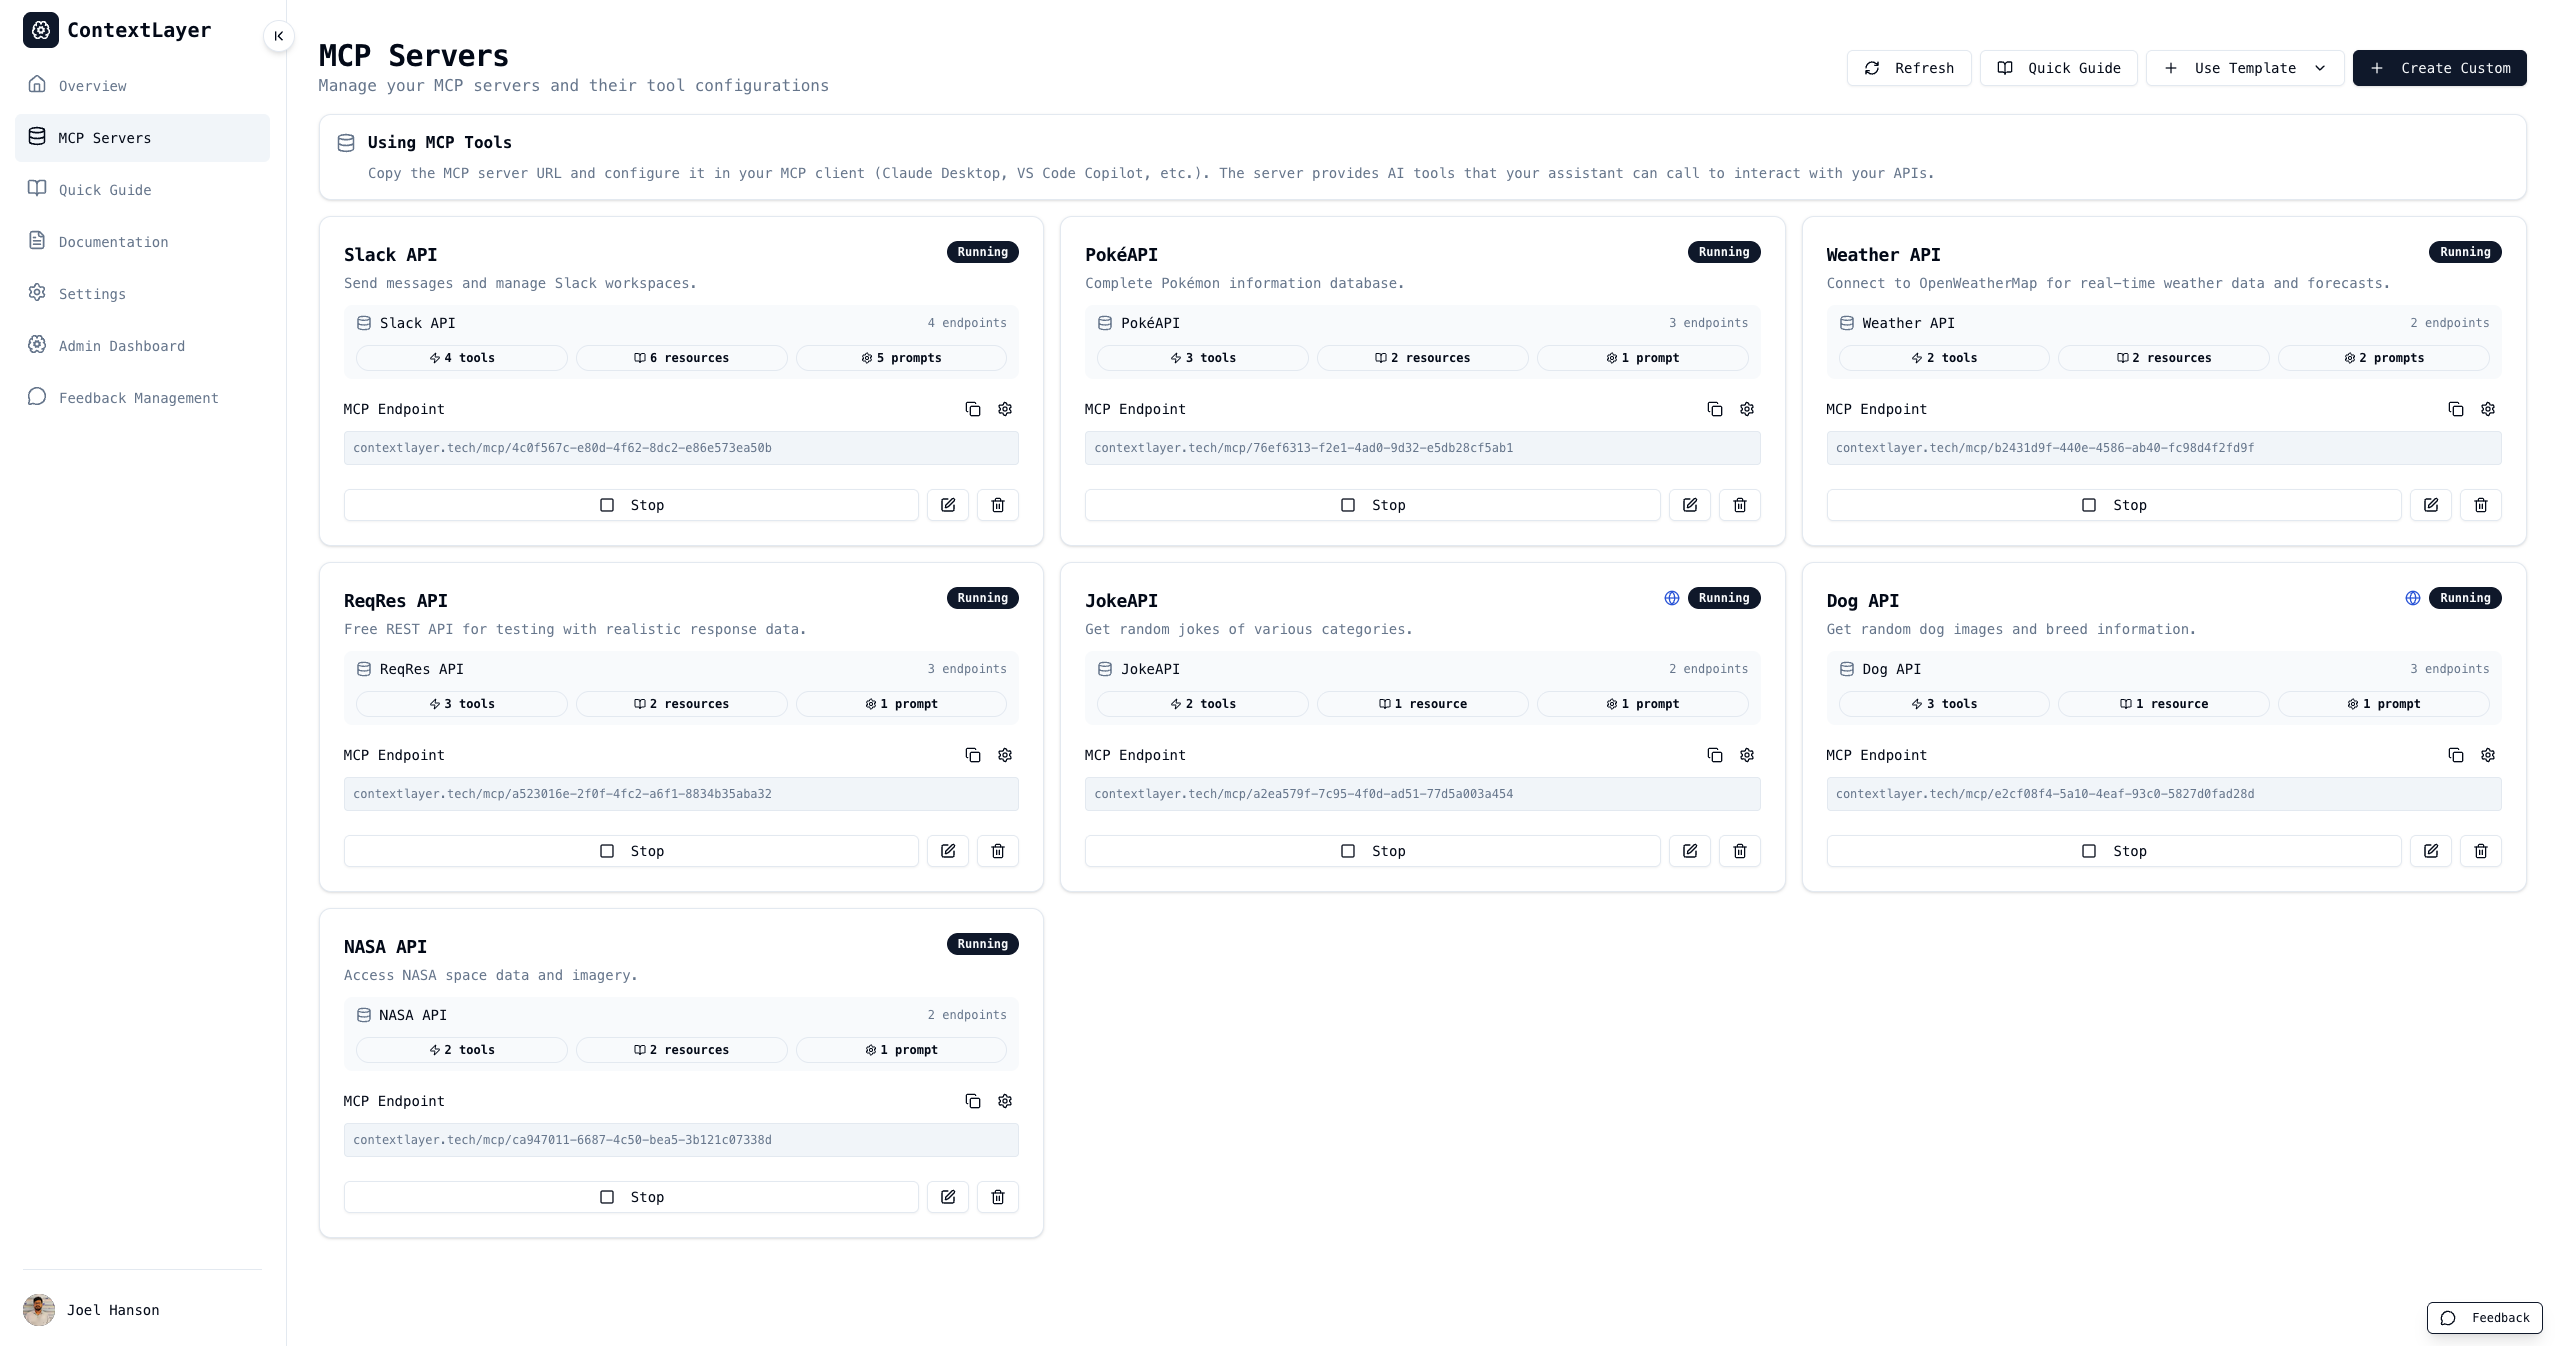
To connect to Claude Desktop, copy the MCP server URL and add it to your Claude configuration:
{
  "mcpServers": {
    "your-api-name": {
      "command": "npx",
      "args": ["-y", "mcp-remote", "https://contextlayer.tech/mcp/your-bridge-id"]
    }
  }
}
Save this configuration in:
- macOS:
~/Library/Application Support/Claude/claude_desktop_config.json - Windows:
%APPDATA%/Claude/claude_desktop_config.json
Now you can ask Claude:
“What’s the current weather in New York?”
Claude will automatically use your ContextLayer MCP Server to call the weather API and return the results.
Real-World Use Cases#
1. GitHub API Integration#
Transform GitHub’s REST API into MCP tools for AI-assisted repository management:
# Before ContextLayer: Write custom MCP server code
# After ContextLayer: Configure in 2 minutes

# You can now ask Claude:
# "Show me all open issues in my repository"
# "Create a new branch called feature/user-authentication"
# "Comment on PR #42 with a review"
2. Weather & Data APIs#
Connect public APIs like OpenWeatherMap, APIs.gov, or NASA data:
# Claude can now:
# - Check weather forecasts
# - Search government databases
# - Access real-time data feeds
3. Internal Company APIs#
Bridge internal APIs that your team uses daily:
# Connect to your:
# - CRM system
# - Inventory management
# - Customer support tools
# - Internal dashboards
4. E-commerce & Business APIs#
Integrate Stripe, Shopify, or other business-critical APIs:
# Enable AI-assisted:
# - Order management
# - Payment processing
# - Inventory tracking
# - Customer analytics
Getting Started with ContextLayer#
Option 1: Use the Hosted Version#
- Visit contextlayer.tech
- Sign up with Google (free account)
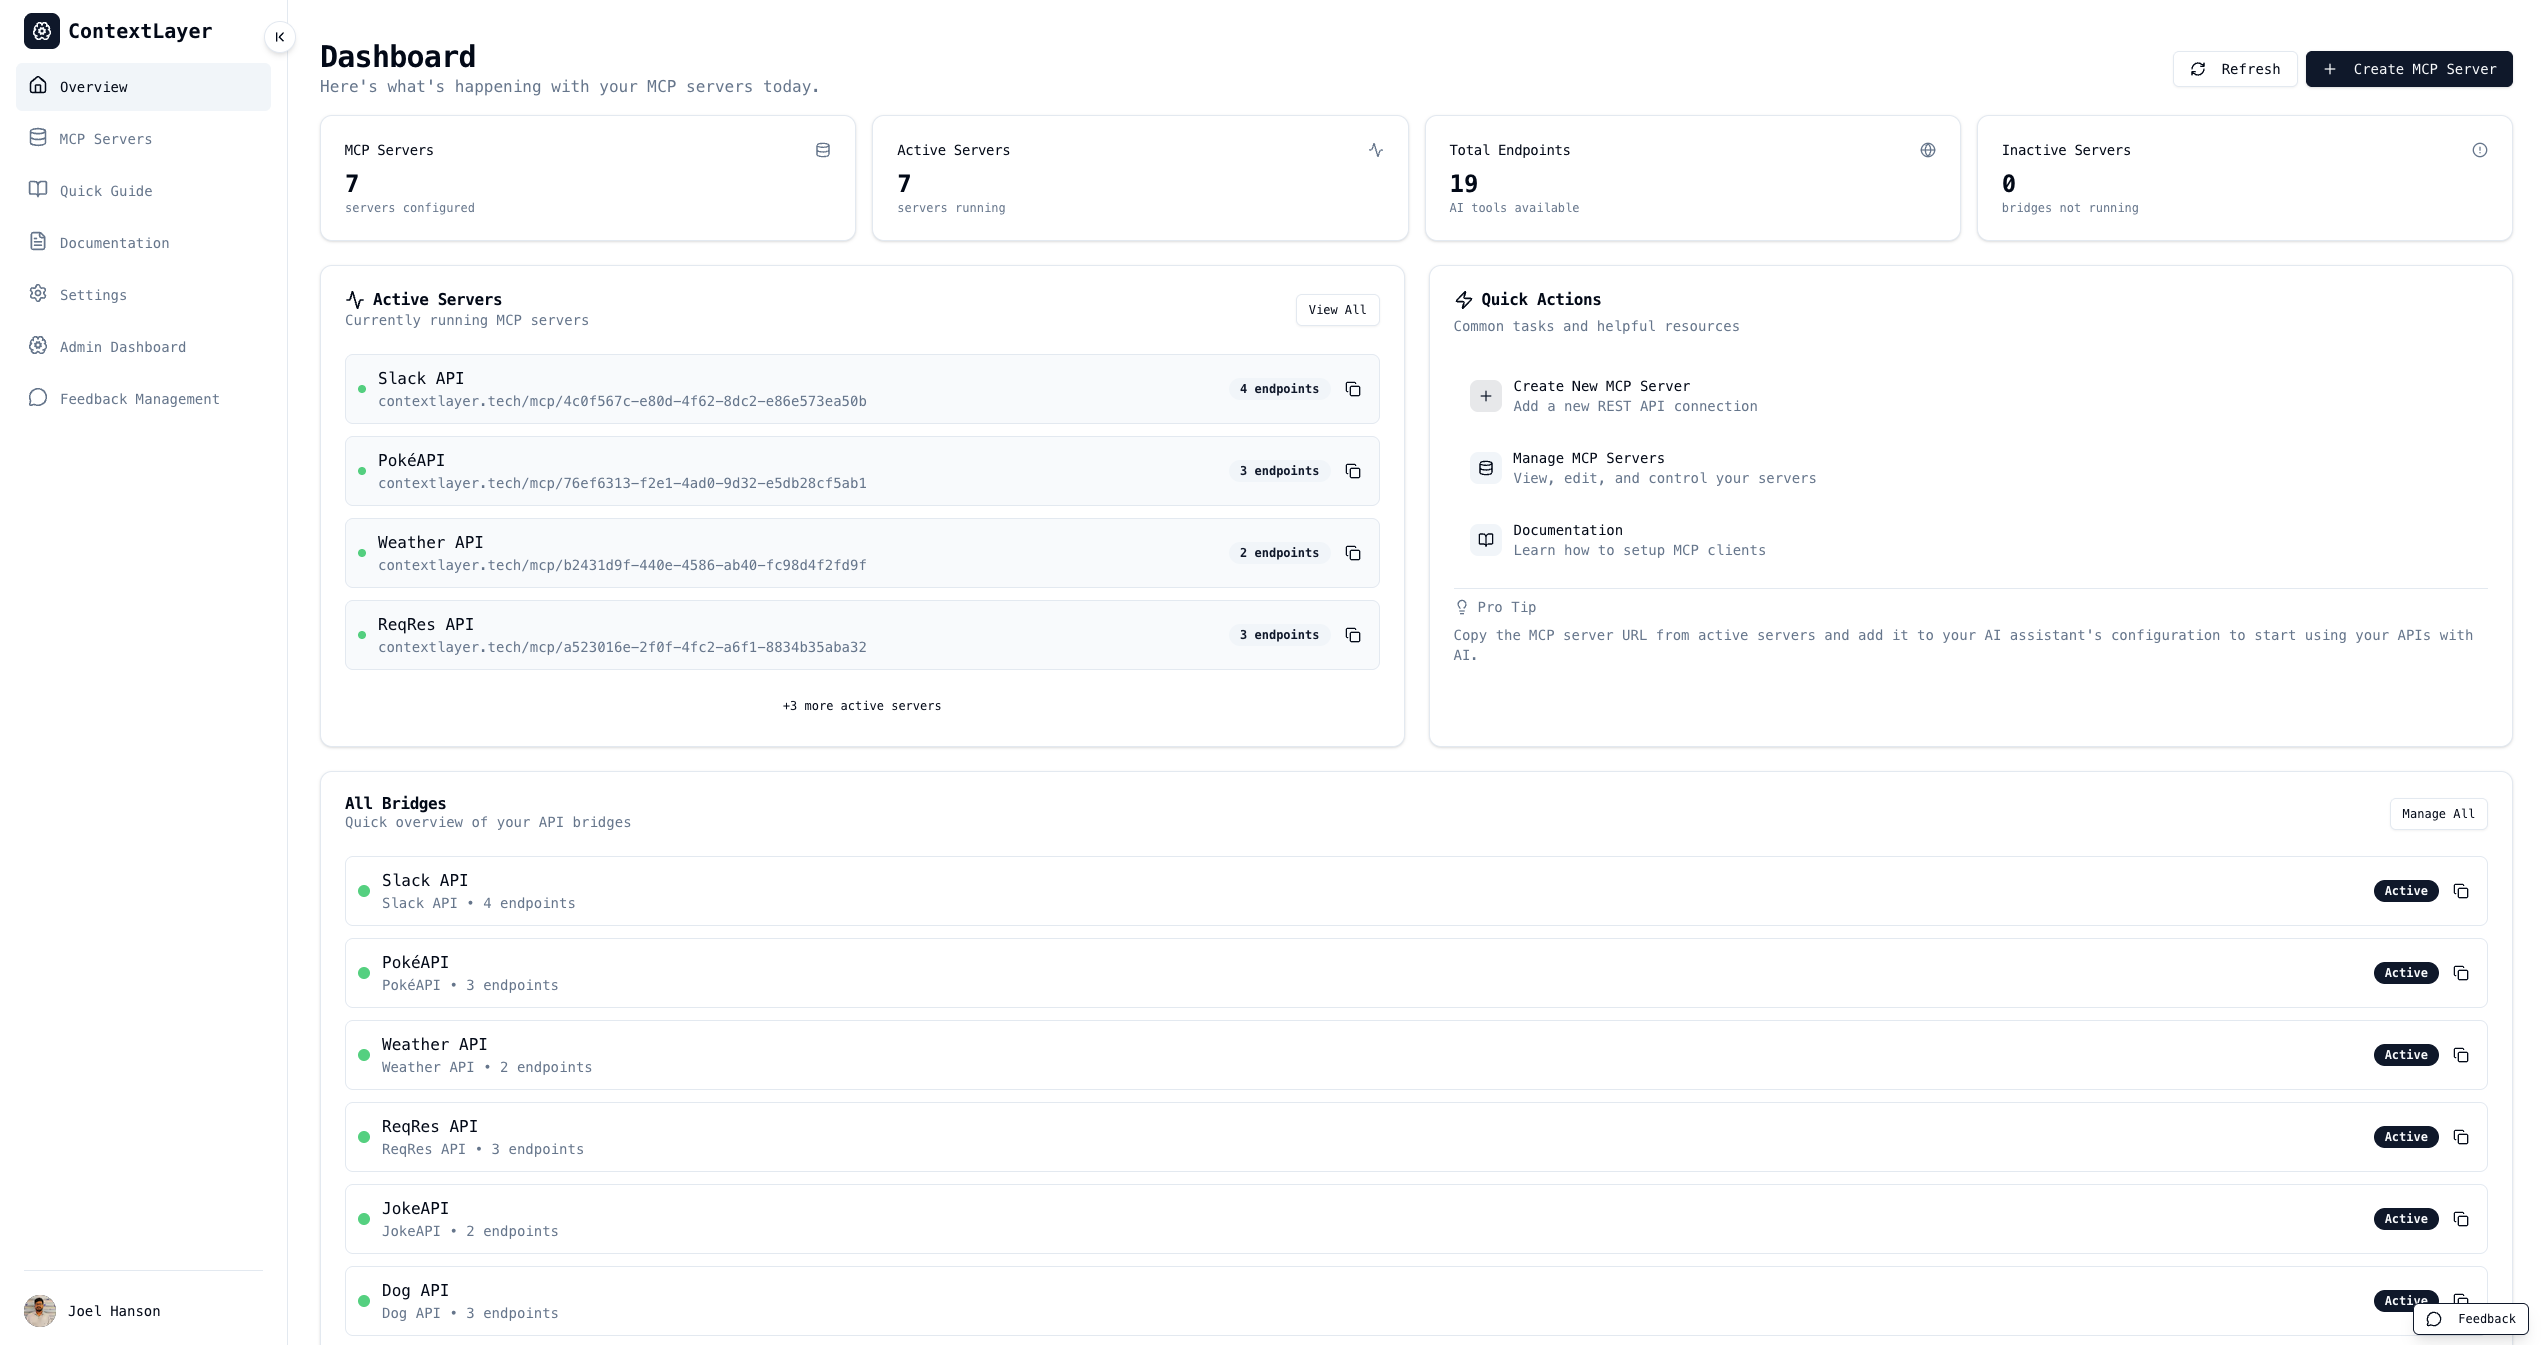
- Create your first MCP Server bridge through the visual dashboard
- Configure your API endpoints and authentication
- Copy the MCP server URL
- Connect to Claude Desktop using the provided configuration
Option 2: Self-Hosted Deployment#
For privacy-conscious organizations or custom deployments:
# Clone the repository
git clone https://github.com/Joel-hanson/contextlayer.git
cd contextlayer

# Start with Docker Compose (includes PostgreSQL)
docker-compose up -d

# Or run manually
npm install
npm run db:migrate
npm run dev
Visit http://localhost:3000 and start creating bridges.
Advanced Features#
OpenAPI/Swagger Import#
If your API already has an OpenAPI specification, ContextLayer can import it automatically:
# Upload your OpenAPI spec (JSON or YAML)
# ContextLayer will:
# - Extract all endpoints
# - Parse request/response schemas
# - Configure authentication methods
# - Generate MCP tools automatically
Getting Involved#
ContextLayer is open source:
Contribute#
- GitHub Repository: github.com/Joel-hanson/contextlayer
- Issues: Report bugs or request features
- Pull Requests: Submit improvements
- Documentation: Help improve guides and examples
Pre-built Connectors Templates#
We’re building a library of pre-configured connectors for popular APIs:
- GitHub
- OpenWeatherMap
- Slack
- Stripe
- Shopify
- And many more…
Check out existing connectors or contribute your own!
Conclusion#
ContextLayer solves a real problem: connecting AI assistants to the APIs you already use shouldn’t require custom code for every integration.
Whether you’re:
- Individual developers wanting Claude to help with daily API tasks
- Small teams integrating internal tools with AI assistants
- Enterprises needing a scalable solution for API-to-AI integration
- API providers wanting to offer MCP compatibility without rewriting
ContextLayer provides a simple, visual, code-free way to bridge REST APIs and Model Context Protocol.
Try it today: contextlayer.tech
Self-host it: github.com/Joel-hanson/contextlayer
Join the community: GitHub Discussions
Related Articles#
API Integration & MCP#
- Convert Your Django DRF Project to MCP in 5 Minutes - Transform Django REST Framework APIs into MCP servers
- Breaking Kafka Walls: Building an MCP Server for Your Kafka Cluster - Learn how to integrate Kafka with AI assistants using MCP
API Development#
- Turn GitHub into Your Free Data Platform: Building APIs with GitHub Actions - Create powerful APIs using GitHub’s infrastructure
- Build Custom Kafka Connectors Fast with This Open Source Template - Streamline your data pipeline development
Automation & Productivity#
- How I Automated My Markdown Publishing on Medium: No More Manual Work - Automate your content publishing workflow
- Useful Git Aliases for a Productive Workflow - Boost your development productivity with Git shortcuts
Stay Connected#
- Website: contextlayer.tech
- GitHub: Joel-hanson/contextlayer
- Blog: joel-hanson.github.io
- LinkedIn: Joel-hanson
Found ContextLayer useful? Star the repository and share it with your team. Together, we’re making AI assistant integration accessible to everyone.